
Overview
Connector SDK is a module within UnifyApps that allows users to connect custom connectors within UnifyApps platform. Through this, customers can connect to any custom end point and start having a bi-directional connection (both receive & send data), through which they can take actions on external apps as well.
Creating Connector SDK
Step 1: Access Connector SDK module
Navigate to
Platform Toolsin the main navigationClick on the
Connector SDKsectionUser will now see a list of all already added Connector SDKs.
Step 2: Create a New Connection Environment
Click on
New Custom ConnectorProvide the following details
Connector Name: Add a unique name for the connectionDescription: Provide a detailed description for future referencesBase URL: Add the base url of the connector user want to addLogo URL: Add a public link of the url where the logo is hosted. This field is optional and can be skipped.png&w=1080&q=75&dpl=dpl_5H5sj51KgVz3D2yHXDGeMZK5v5yJ)
.png)
Step 3: Configure connector settings
Once the connector has been added, move to the next screen to configure connector settings.
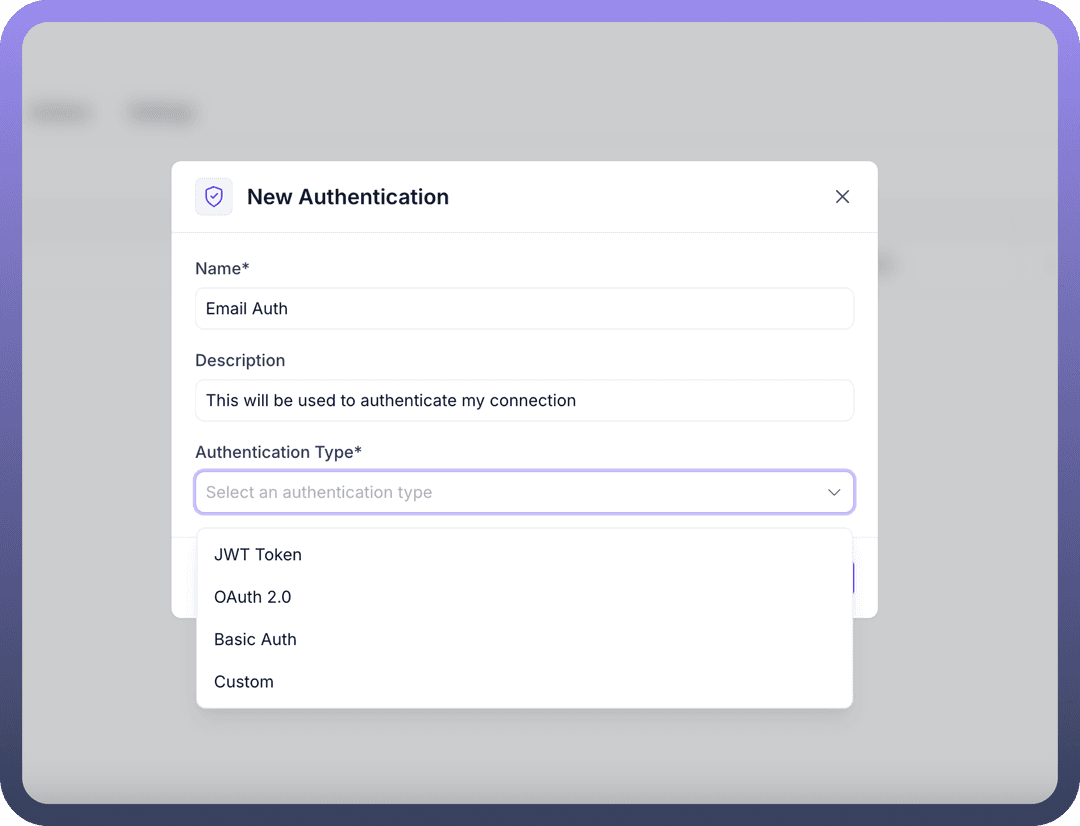
Section 1: Authentication
In this section, the authentication type for the connector can be defined. Please note that multiple authentication mechanisms can be added at the same time, but 1 type of authentication can be added only once.
Click on
New Authenticationon the top rightProvide
Nameof the authentication mechanismProvide a detailed
Descriptionfor future referencesSelect from different
Authentication TypeAccess Token
JWT Auth
OAuth 2.0
Basic
Custom
Once user click on Create, user will land onto the next screen where more details need to be provided as per the Type of authentication selected
Access Token
Define the
Input schemafor this authenticationProvide
Headers/Tokens& other necessary information shown in the screenshot below to setup the authentication mechanism

JWT Token
Define the
Input schemafor this authenticationDefine the
Output schemaProvide
Private Key,Signing algorithm& other necessary information shown in the screenshot below to setup the authentication mechanism.png&w=1080&q=75&dpl=dpl_5H5sj51KgVz3D2yHXDGeMZK5v5yJ)
.png)
OAuth 2.0
Define the
Input schemaon for this authenticationProvide
Client ID,Secret ID& other necessary information shown in the screenshot below to setup the authentication mechanism.png&w=1080&q=75&dpl=dpl_5H5sj51KgVz3D2yHXDGeMZK5v5yJ)
.png)
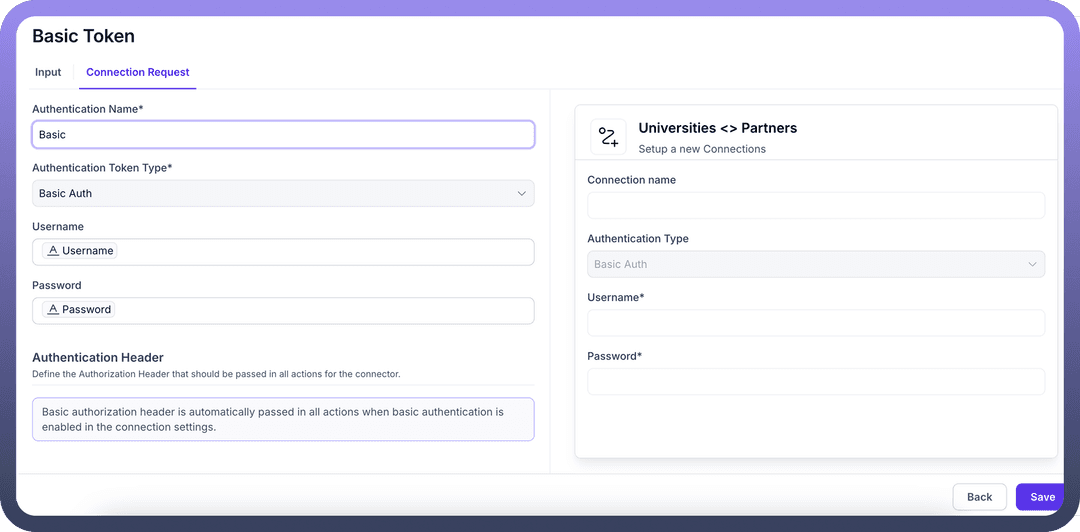
Basic
Define the Input schema on for this authentication
Provide UserName & Password & other necessary information shown in the screenshot below to setup the authentication mechanism
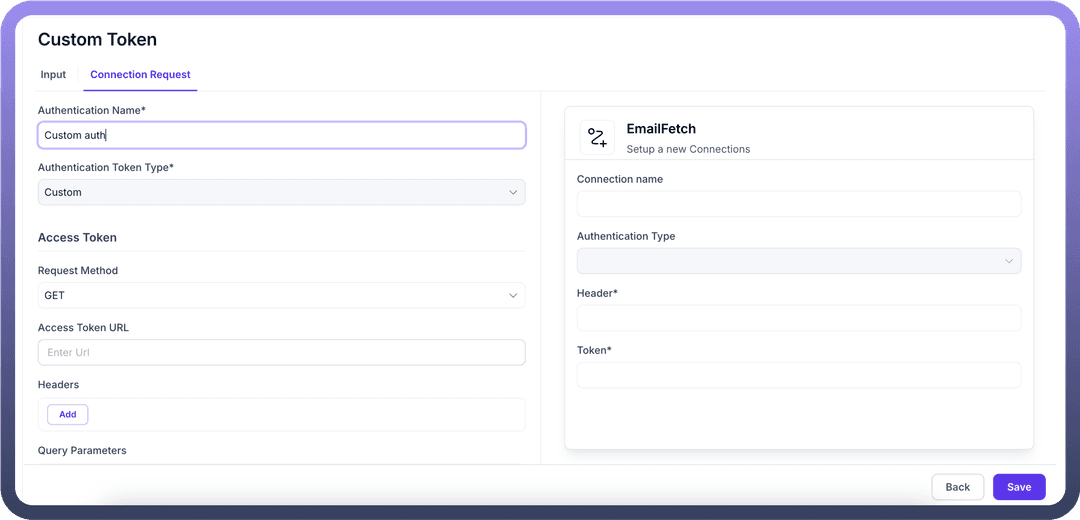
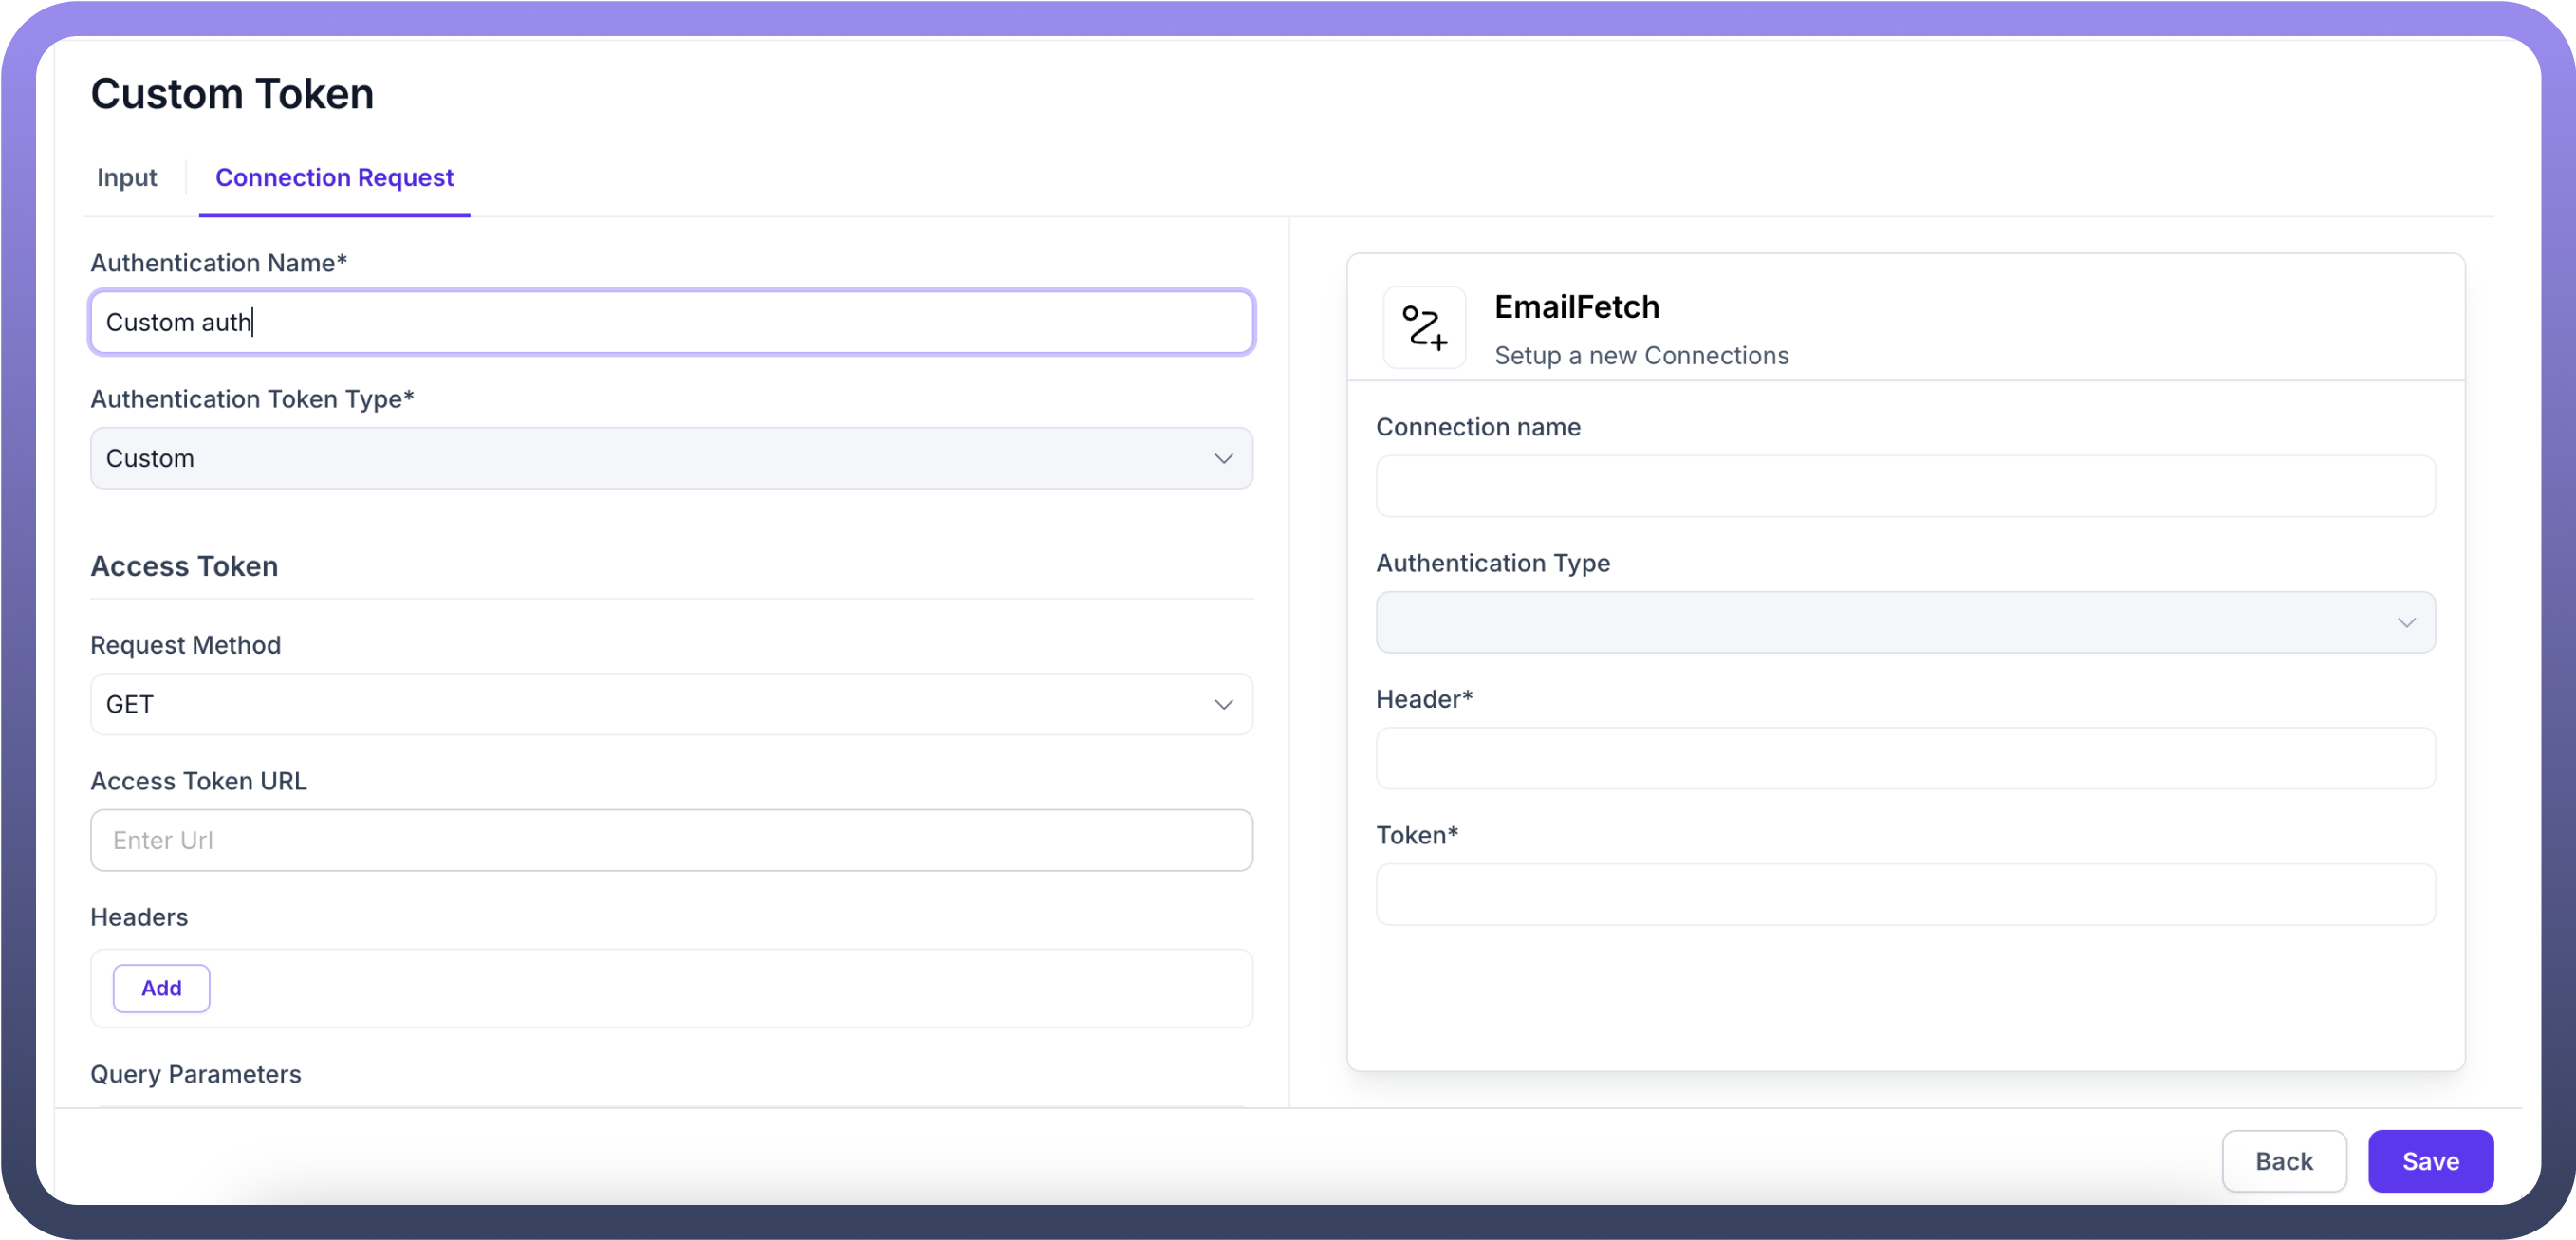
Custom
Define the Input schema on for this authentication
Provide Token & other necessary information shown in the screenshot below to setup the authentication mechanism
Section 2: Triggers
In this section, Triggers can be defined on which the connection should get activated .
Click on
New Triggeron the top rightProvide
Nameof the TriggerProvide a detailed
Descriptionfor future referencesSelect from different Type
WebhookPolling.png&w=1080&q=75&dpl=dpl_5H5sj51KgVz3D2yHXDGeMZK5v5yJ)
.png)
Trigger Type = Webhook
This type trigger works on setting up webhooks and gets activated as soon as an event is received on the webhook
To set this up, define the
Input schemaChoose
Webhook Registration Type- eitherManualorAutomatic.png&w=1080&q=75&dpl=dpl_5H5sj51KgVz3D2yHXDGeMZK5v5yJ)
.png)
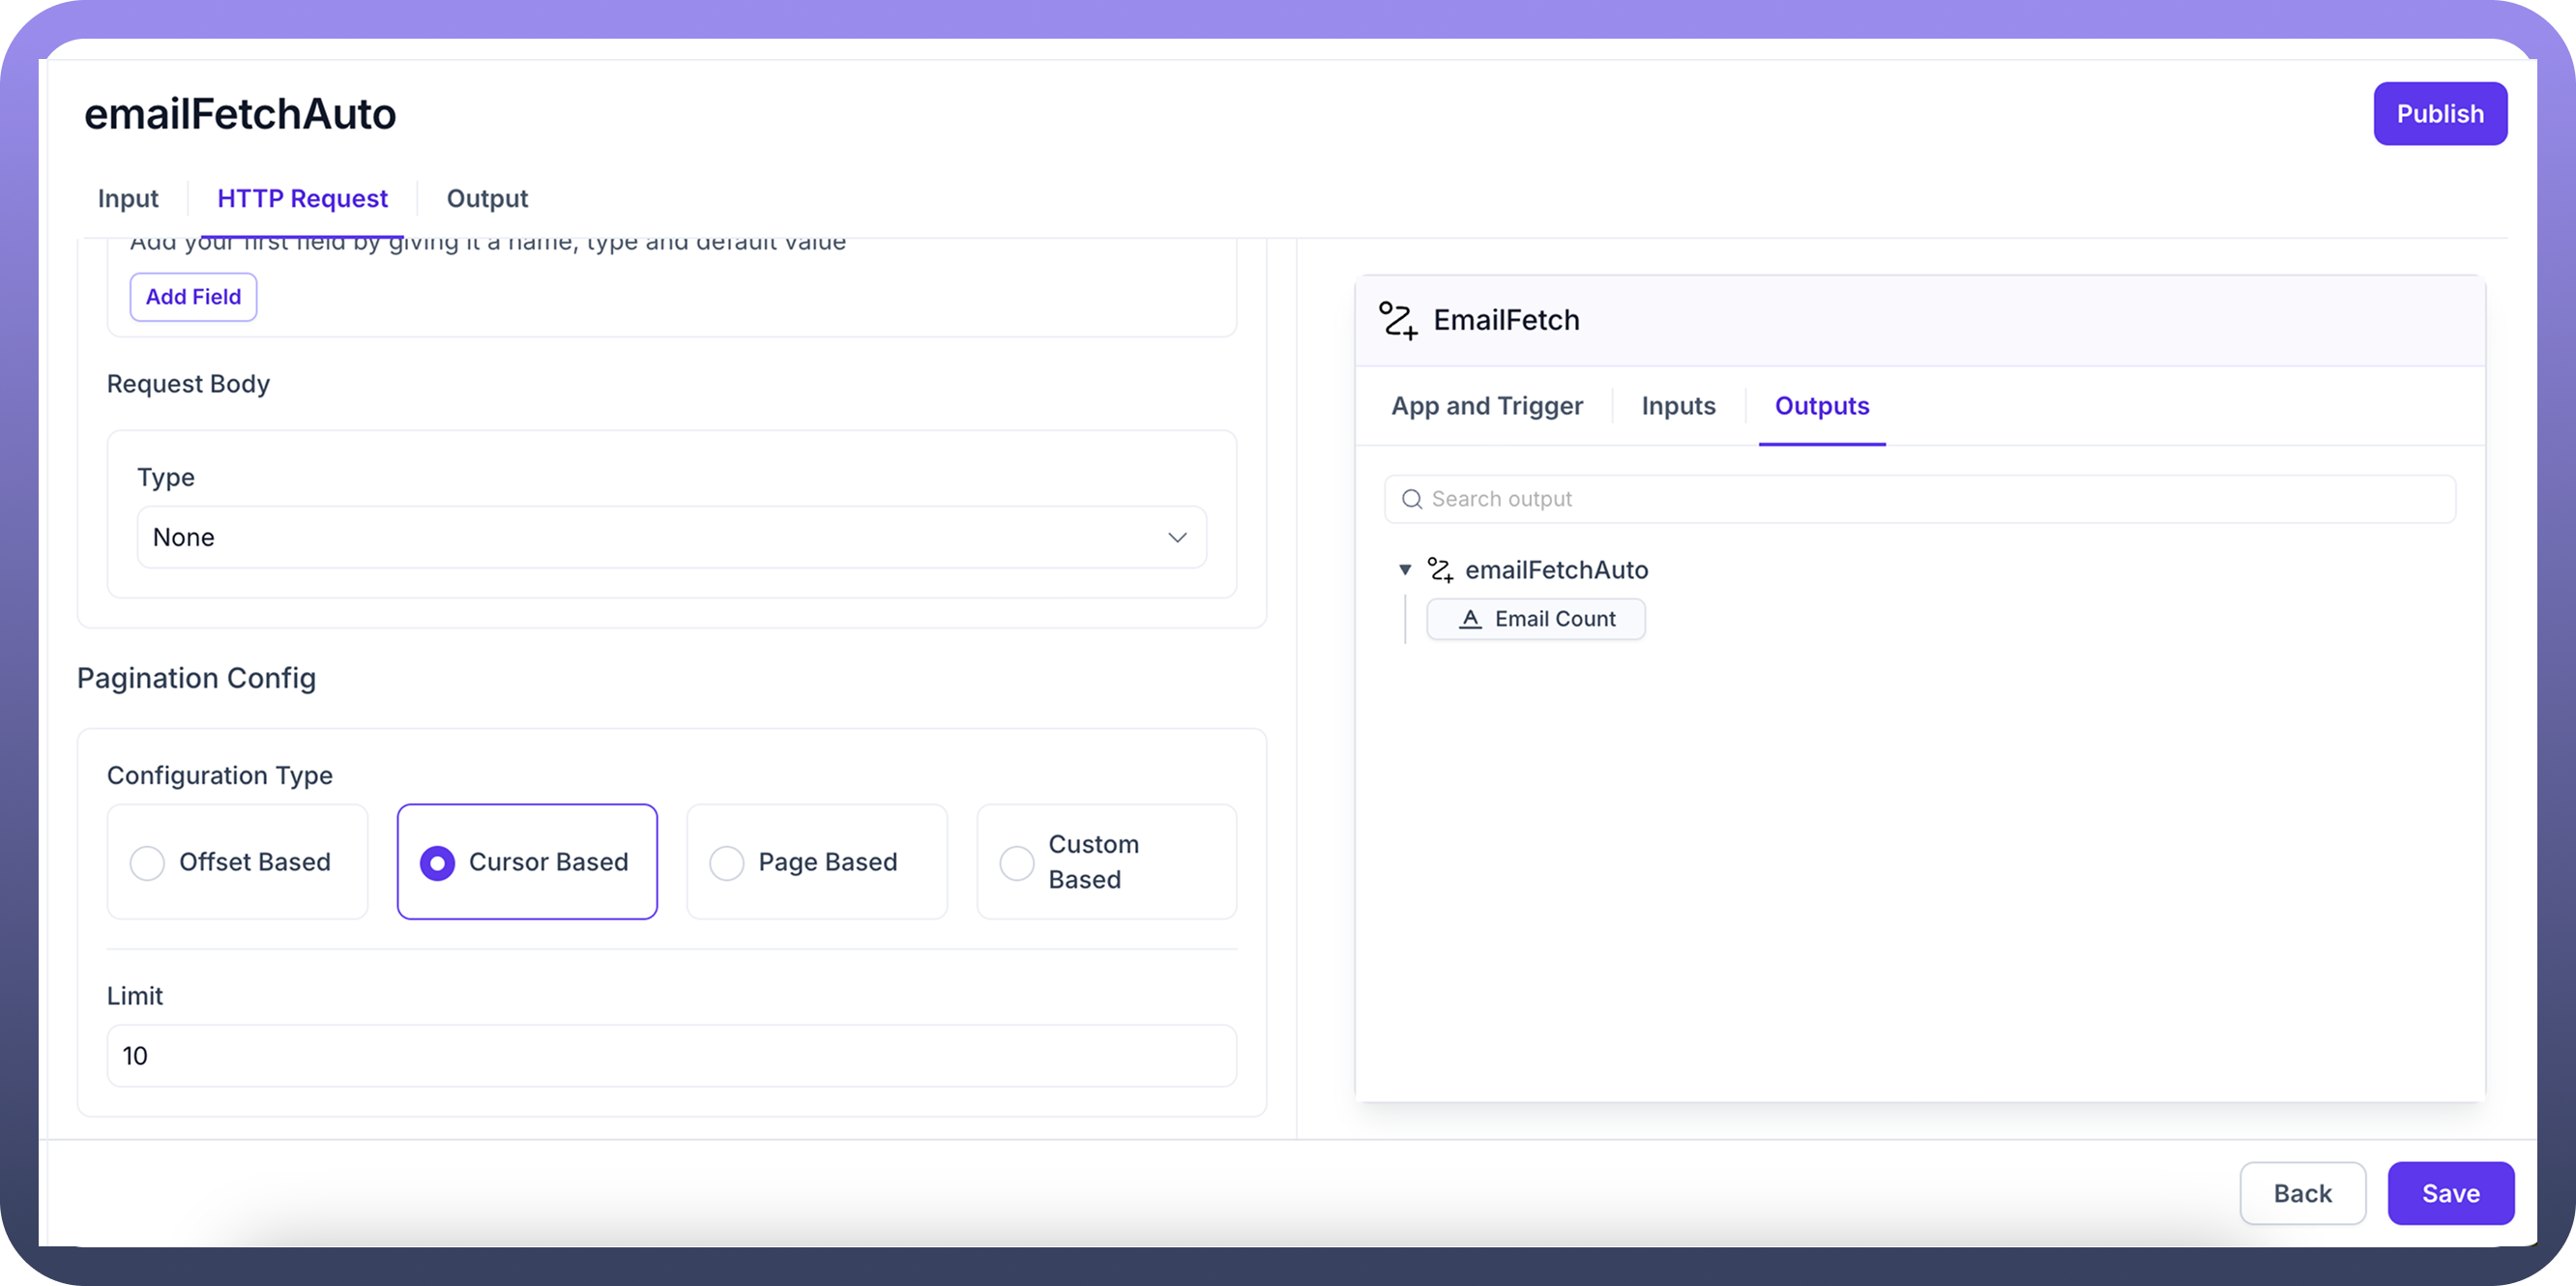
Trigger Type = Polling
This type trigger depends on regular polling on setting up webhooks and gets activated as soon as an event is received on the webhook
To set this up, define the
Input schemaChoose
Pagination config& other necessary settings as shown in the screenshot below
Section 3: Actions
In this section, Actions can be defined which need to be executed once a trigger is received on this Custom Connector SDK .
Click on
New Actionson the top rightProvide
Name of the ActionProvide a detailed
Descriptionfor future referencesDefine the action details in the next section. For e.g. in the screenshot below, we are using GET action targeted from the entered URL
.png&w=1080&q=75&dpl=dpl_5H5sj51KgVz3D2yHXDGeMZK5v5yJ)
.png)
.png&w=1080&q=75&dpl=dpl_5H5sj51KgVz3D2yHXDGeMZK5v5yJ)
.png)
Section 4: Settings
Under settings, user can define
Object Type
Two options are available: Dynamic & Static
If Dynamic is selected, no input is needed
If Static is selected, user will have to create the List Object Schema to use this
Availability of this connector in Pipeline
Switch On the toggle to enable this in Pipeline
Once switched On, different actions need to be mapped from Pipeline to this connector
All standard Pipeline actions are available in the left column, and can be mapped to the list of Actions which have been created in this Connector SDK
Availability of this connector in Automation
Switch On the toggle to enable this in Automation
.png&w=1080&q=75&dpl=dpl_5H5sj51KgVz3D2yHXDGeMZK5v5yJ)
.png)
Step 4: Publish the connector
Once all settings have been configured, click on Publish to start using the custom SDK connector
Best Practices
Use Descriptive Names: Give user Custom Connector SDKs and its settings clear, descriptive names that indicate their purpose and destination.
Include Detailed Descriptions: Add comprehensive descriptions to help reviewers understand the purpose and scope.
Review Authentication Thoroughly: Since authentication is the key for these connections to work, ensure that all endpoints and tokens are configured correctly
Test After Connection: After creating any connection, test the connection using sample/dummy values